These bohemian style anklets have
been in style lately and they are the perfect summer accessory if you're
looking for something different and unique. I saw a similiar one in Anthropologie
for way more money that I was willing to spend on something like this. Let's be
honest usually when I buy something like this I wear it once or twice in my
lifetime. So I didn't want to shell out an enormous amount for something I
thought I could make it myself. So if you have been invited to a beach wedding
or going to a festival, holiday etc, you can make one for yourself for really
cheap.
So here is a step by
step DIY for a Bohemian Anklet. It may look like a lot of steps but I promise
it's really simple. All you need is some patience because it took me a while to
make it but I'm happy with how it turned out.
Note: Please excuse the
foot pictures. I couldn't be showing you an anklet without some foot pictures.
I have been out in the sun a lot so my feet aren't perfect they have been
tanned and not that uniformly as I would like because of the kind of footwear or
sandals I've been wearing. I may or may not have spent some extra time editing
my feet. ( Now that's a first). Anyway keep on reading for the DIY!
The Things you will need:
1. White Thread - It should be white thread of some good quality nylon or any other similar material with a thickness more than normal sewing thread.
2. Measuring Tape - To measure your foot and how far you would want to put in the charms.
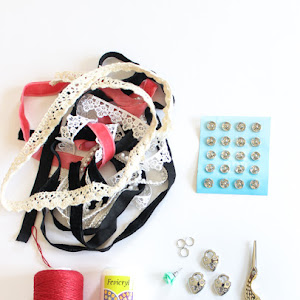
3. A Pair of Scissors.4. Charms of your choice. You can find a lot of bohemian looking charms at a local craft store and if you can't, just use the charms from an old bohemian necklace or earring which you aren't going to be wearing anymore. 5. Jump Rings - These will help you attach the charms to the rope because the rope is considerable thicker than the opening on normal charms. |
These are the charms I used!
Step 2 - Take one end of any of the 4 strings and tip a knot around all of them to secure it.Step 3 -Start Fishtail braiding the strings. There are a tons of different types of knots that you can do but I chose this because it's simple and everyone can find how to do a fishtail braid. ( If anyone wants I can do a separate post on fishtail braids).
Step 4 -The easiest tip is to take the outer string from each side and braid them in. Once you're done braid it upto the mid section of your foot and tie a knot at the end. Make sure you leave the ends of the strings like that and don't cut it yet because we will be incorporating it further.
Now attach one end of the bigger charm with the help of a jump ring. I'd suggest putting the jump ring into one of the braided bits instead of the knot at the end because it can make it fall out. Use some pliers to open and close the jump rings.
Now keep fishtail braiding just like Step1,2,3,4 till the braid reaches your ankle. Once it reaches the ankle, tie a knot. Now take two separate double loops like in step one and start making fishtail braids in the opposite directions till it halfway covers your ankle on both sides. Now attach some jump rings and put the ankle bells that look so pretty and sound great too. Keep these strings long too because they should be able to tie around your ankle.
Now all you've got to do tie the ends of the strings into simple knots to keep all the pieces of strings together and I would prefer locking the ends with a flame. I thought of using the leaf charms at the ends on the knots but then I liked how it looked without them but you can go ahead use them if you'd like. And we're done!


that's so cute! so simple to do, too
ReplyDeletefrom helen at thelovecatsinc.com
ps. there's a USA beauty giveaway inc lorac, tarte etc on my blog! click here.
Thanks! :D Yes it is incredibly simple to make.
DeleteSuch a great idea! Absolutely love it!
ReplyDeleteAnika | www.anikamay.co.uk
Thank you Anika! x
Delete